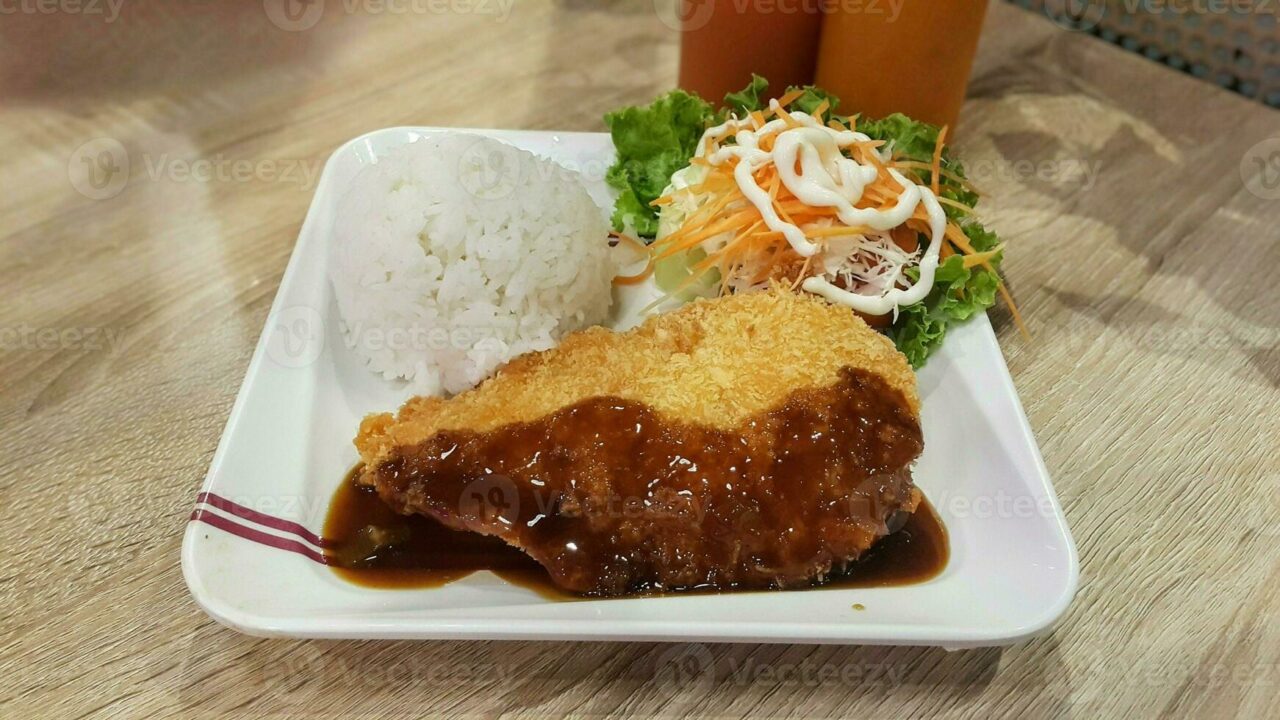
There’s something magical about the sound of perfectly crispy chicken katsu sizzling in the pan – that satisfying crackle that tells you dinner is about to be extraordinary. But here’s the thing: you don’t need a trip to an expensive Japanese restaurant or hours of complicated prep to enjoy this beloved comfort food. This Japanese Chicken Katsu recipe transforms simple pantry staples into a restaurant-quality meal that’s ready in just 30 minutes, making it perfect for those hectic weeknights when you’re feeding a hungry family but still want something special on the table.
I discovered the magic of homemade katsu during one of those particularly chaotic weeks when takeout was getting expensive but my family was craving something more exciting than our usual rotation. What started as a desperate attempt to recreate our favorite restaurant dish quickly became our go-to weeknight winner. The beauty of this recipe lies in its simplicity – with just a handful of ingredients you probably already have in your pantry, you can create that signature golden, crunchy exterior and juicy interior that makes katsu so irresistible. Plus, it’s endlessly adaptable for meal prep, busy schedules, and picky eaters.
The best part? While your family thinks you’ve spent hours in the kitchen creating this crispy masterpiece, you’ll know the secret: this Japanese Chicken Katsu is actually one of the most straightforward and forgiving recipes in your weeknight arsenal. Let me show you how to make magic happen with just a few simple ingredients and techniques that guarantee success every single time.
Why You’ll Love This Recipe
This Japanese Chicken Katsu checks every box for busy families looking for maximum flavor with minimal fuss. First and foremost, it’s incredibly quick – from start to finish, you’re looking at just 30 minutes, making it faster than most delivery options and infinitely more satisfying. The ingredient list is refreshingly simple, relying on pantry staples like flour, eggs, and breadcrumbs that you likely already have on hand, which means no special shopping trips or expensive specialty ingredients.
What really sets this recipe apart is its foolproof nature. Unlike some finicky fried foods that require precise temperatures and timing, this katsu method is forgiving and consistent. The three-step breading process creates an incredibly crispy exterior that stays crunchy even as leftovers, while the pounding technique ensures the chicken cooks evenly and stays juicy. It’s also incredibly versatile – you can easily double the recipe for meal prep, substitute different proteins, or even prepare the breaded cutlets ahead of time for even quicker weeknight cooking.
Perhaps most importantly, this is a crowd-pleaser that appeals to both adventurous eaters and picky family members. The familiar crispy coating makes it approachable for kids, while the authentic flavors satisfy anyone craving genuine Japanese comfort food. Plus, it pairs beautifully with simple sides like steamed rice and vegetables, making it easy to round out a complete, satisfying meal.
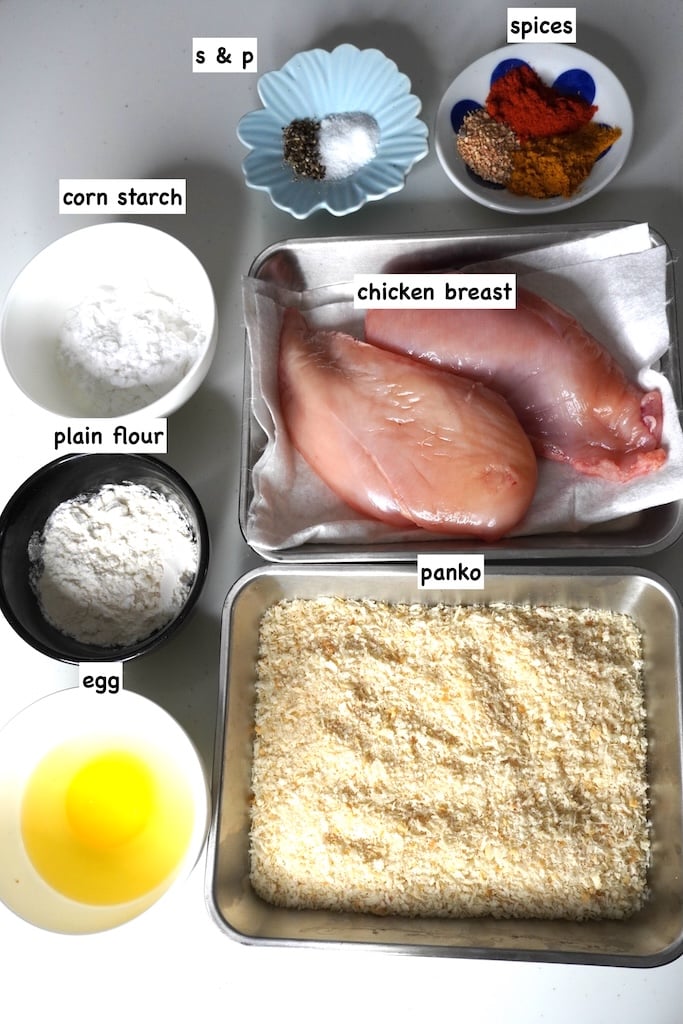
Key Ingredients
The magic of authentic Japanese Chicken Katsu lies in the quality and preparation of just a few essential ingredients. Boneless, skinless chicken breasts or thighs form the foundation – I prefer thighs for their extra moisture and flavor, but breasts work beautifully too and cook slightly faster for those ultra-busy nights. The key is pounding them to an even ½-inch thickness, which ensures quick, even cooking and prevents the dreaded dry chicken syndrome. Fresh panko breadcrumbs are absolutely non-negotiable here; their larger, airier texture creates that signature light, crispy coating that regular breadcrumbs simply can’t match. You can find panko in most grocery stores now, but if you’re in a pinch, you can make your own by pulsing day-old bread in a food processor. All-purpose flour serves as the foundation layer in our three-step breading process, helping the egg wash adhere properly and creating multiple layers of texture. Large eggs, beaten with just a splash of water, act as the crucial binding agent that makes everything stick together. Finally, neutral oil with a high smoke point like vegetable or canola oil is essential for achieving that perfect golden-brown color without burning – you’ll need enough for shallow frying, which uses less oil than deep frying but still gives incredible results.
Pro Tips & Variations
The secret to restaurant-quality katsu lies in a few key techniques that make all the difference. First, always pat your chicken completely dry before starting the breading process – any moisture will prevent proper adhesion and create soggy spots. When pounding the chicken, place it between plastic wrap or in a sealed bag to prevent splattering, and use gentle, even strokes rather than aggressive pounding. For the breading station, set up your three bowls in assembly-line fashion: flour, beaten eggs, and panko. Use one hand for wet ingredients and one for dry to prevent creating a gummy mess on your fingers.
Temperature control is crucial for perfect katsu. Heat your oil to 340°F – if you don’t have a thermometer, test with a pinch of panko; it should sizzle immediately but not violently bubble. Cook the cutlets for 3-4 minutes per side until golden brown, and resist the urge to flip too early as this can cause the coating to fall off. For extra insurance, let the breaded cutlets rest for 10-15 minutes before frying, which helps the coating adhere better.
This recipe is endlessly adaptable for different dietary needs and preferences. For a lighter version, you can bake the breaded cutlets at 425°F for 15-20 minutes, flipping once halfway through. Pork cutlets work beautifully with this same method for traditional tonkatsu, and even firm fish like cod or salmon can be transformed into delicious katsu. For meal prep enthusiasts, bread the cutlets on Sunday and store them covered in the refrigerator for up to three days – they’ll actually fry up even better after resting. You can also freeze breaded uncooked cutlets for up to three months; just thaw overnight before cooking.
Like many Japanese comfort foods, katsu pairs wonderfully with other international flavors. Serve it alongside Japanese Beef Curry for an authentic combination, or slice it up and use it as a protein topping for salads and grain bowls. The crispy texture also makes it an excellent addition to sandwiches and wraps for next-day lunches.
Nutritional Highlights
Despite its indulgent crispy coating, Japanese Chicken Katsu can absolutely fit into a balanced weeknight meal plan. Each serving provides approximately 35 grams of high-quality protein, making it an excellent choice for growing families and active lifestyles. The shallow-frying method uses significantly less oil than traditional deep-frying, keeping the fat content reasonable while still delivering that satisfying crunch. When paired with steamed vegetables and brown rice, this becomes a well-rounded meal that provides sustained energy without the heavy feeling that often comes with fried foods.
The panko coating adds a small amount of complex carbohydrates, and if you’re looking to boost the nutritional profile further, you can easily incorporate whole wheat panko or even add some sesame seeds or chopped nuts to the breading mixture for extra minerals and healthy fats. The key to making this dish work in a healthy eating plan is portion control and smart sides – think plenty of colorful vegetables and reasonable portions of rice or noodles. Unlike many restaurant versions that can be quite heavy, this homemade version allows you to control the ingredients and cooking method, making it a much lighter option that still satisfies those comfort food cravings.
FAQ
Can I make Japanese Chicken Katsu ahead of time?
Absolutely! This recipe is fantastic for meal prep. You can bread the chicken cutlets up to 3 days in advance and store them covered in the refrigerator – they actually develop better adhesion after resting. For even longer storage, freeze the breaded uncooked cutlets for up to 3 months. Just thaw overnight in the refrigerator before cooking. If you want to cook them completely ahead, the fried cutlets keep well in the refrigerator for up to 4 days and can be reheated in a 350°F oven for 8-10 minutes to restore crispiness.
What can I substitute for panko breadcrumbs?
While panko creates the most authentic texture, you can make your own by processing day-old bread in a food processor until you get coarse, irregular crumbs. Regular fine breadcrumbs will work in a pinch, though the texture won’t be quite as light and crispy. For a gluten-free version, crushed cornflakes or gluten-free panko work well, and for extra flavor, try adding a tablespoon of sesame seeds or finely grated parmesan to whatever breadcrumb substitute you choose.
How do I store and reheat leftover katsu?
Store leftover katsu in an airtight container in the refrigerator for up to 4 days. The key to reheating is restoring the crispiness – avoid the microwave which will make the coating soggy. Instead, reheat in a 350°F oven for 8-10 minutes, or in a dry skillet over medium heat for 2-3 minutes per side. You can also slice leftover katsu and use it cold in salads or sandwiches, where the crispy coating adds wonderful texture even without reheating.
Japanese Chicken Katsu proves that weeknight dinners don’t have to choose between convenience and satisfaction. With just 30 minutes and a handful of pantry staples, you can create a restaurant-quality meal that brings the whole family to the table with genuine excitement. The crispy, golden exterior gives way to perfectly tender chicken, while the simple preparation method means you can tackle this recipe even on your busiest nights.
What makes this recipe truly special is how it transforms ordinary ingredients into something extraordinary through technique rather than complexity. Whether you’re introducing your family to Japanese flavors for the first time or recreating a beloved restaurant favorite at home, this katsu delivers authentic taste without intimidating preparation. Plus, the make-ahead friendly nature means you can prep on weekends for even quicker weeknight meals.
I’d love to hear how this Japanese Chicken Katsu works in your kitchen! Share your photos and any creative variations you discover – and don’t forget to save this recipe for those nights when you want something special but don’t have hours to spend cooking. Happy cooking!
Find the complete recipe card below ↓

Japanese Chicken Katsu
Equipment
- Large skillet
- Meat mallet
- 3 shallow bowls
- Paper towels
- Tongs
Ingredients
- 4 boneless skinless chicken breasts about 6 oz each
- 1 cup all-purpose flour
- 3 large eggs beaten
- 2 cups panko breadcrumbs
- 1 cup vegetable oil for frying
- 1 tsp salt
- ½ tsp black pepper
- 4 cups cooked white rice for serving
- 2 cups shredded cabbage for serving
Instructions
- Place chicken breasts between plastic wrap and pound to ½-inch thickness. Season both sides with salt and pepper.
- Set up three shallow bowls: flour in the first, beaten eggs in the second, and panko breadcrumbs in the third.
- Dredge each chicken cutlet in flour, shaking off excess, then dip in beaten eggs, and finally coat thoroughly with panko, pressing gently to adhere.
- Heat oil in a large skillet over medium-high heat to 340°F. If you don't have a thermometer, test with a pinch of panko - it should sizzle immediately.
- Carefully place breaded cutlets in hot oil and cook for 3-4 minutes per side until golden brown and internal temperature reaches 165°F.
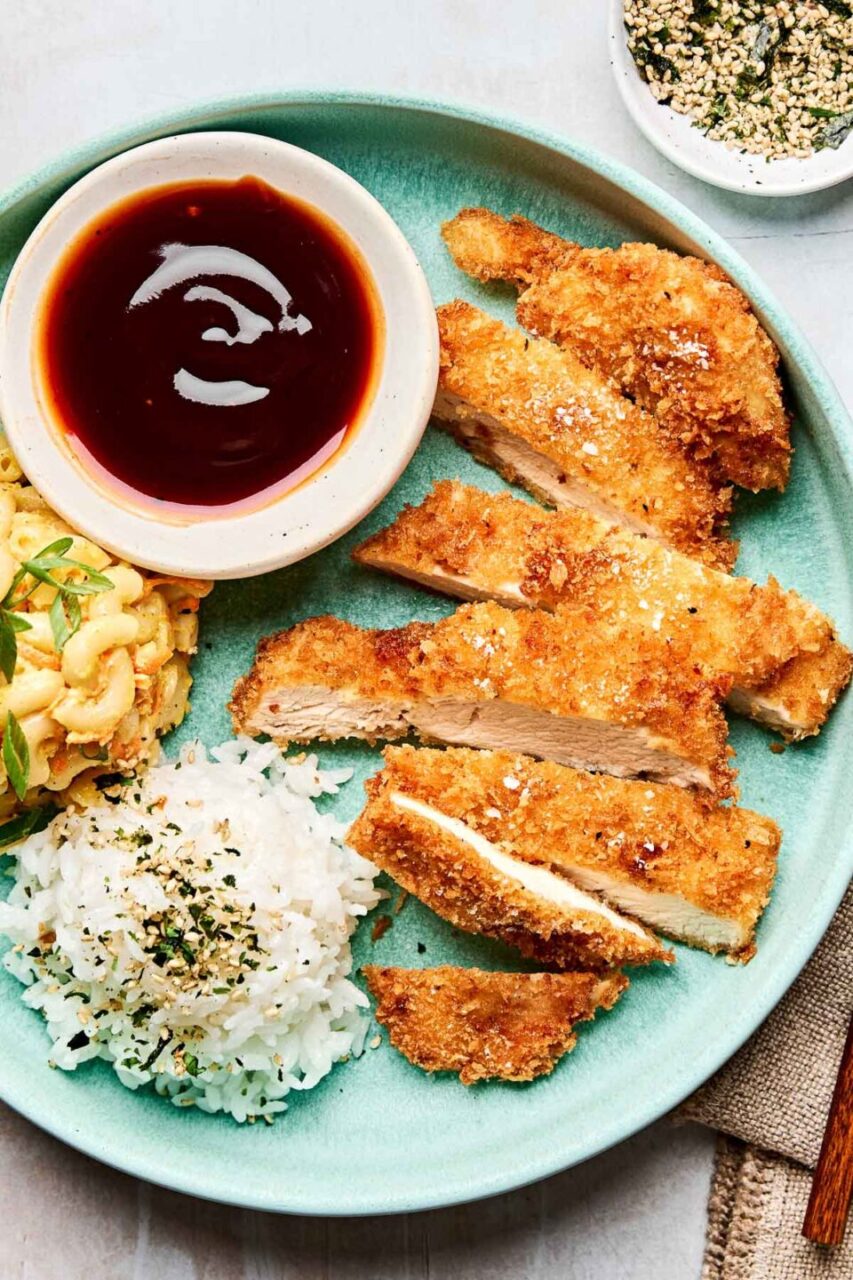
- Transfer to a paper towel-lined plate to drain briefly, then slice into strips.
- Serve immediately over rice with shredded cabbage and katsu sauce.
