

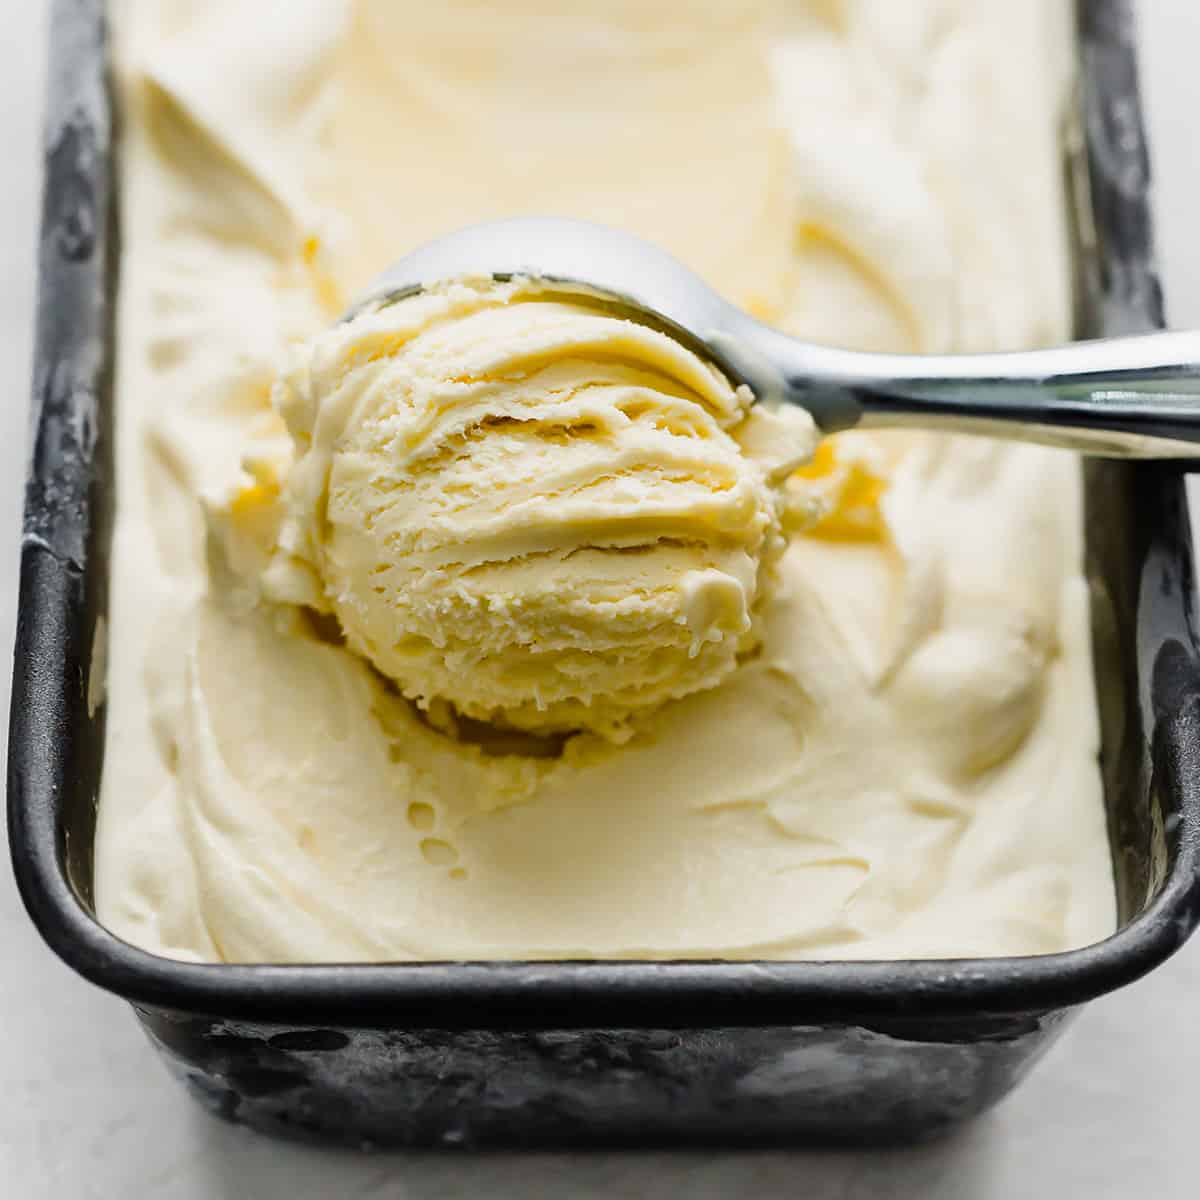
There is a moment every summer — usually right after dinner, when the heat of the day is still hanging in the air and everyone at the table starts giving each other the look — when nothing else will do but ice cream. Not the stuff from a carton that’s been sitting in the back of the freezer since March. Real, homemade vanilla ice cream. The kind that’s pale golden from egg yolks, fragrant with real vanilla, and so rich and creamy that it barely needs anything on top. This is that recipe, and once you make it, you’ll understand why it earns a permanent spot in your summer rotation. If you’re also looking for other classic warm-weather desserts, our Key Lime Pie — Tangy Graham Crust Florida Classic That’s Easier Than You Think is another crowd-pleaser worth having in your repertoire, and if you love creamy, fridge-set treats, our No Bake Cheesecake — Cool, Creamy & Fridge-Set Dessert the Whole Family Will Love is another must-try.
Here’s the thing about homemade ice cream that most people don’t realize until they make it: it’s surprisingly practical. Yes, you need an ice cream maker, but the hands-on time is minimal. You make the custard base in about 20 minutes, chill it overnight (or while you’re at work), churn it in the evening, and by dessert time you’ve got something that completely blows store-bought out of the water. It’s a make-ahead dream for busy families — and since the base uses ingredients you likely already have in your fridge and pantry, it’s budget-friendly too. A batch that serves 8 costs a fraction of a premium pint at the grocery store.
This is our go-to churned vanilla base at Jango Recipes, and we treat it exactly like we treat every weeknight dinner hero: maximum flavor, minimum fuss, and genuinely worth making again. Whether you’re scooping it next to a warm slice of Blueberry Pie with a Classic Lattice Top or piling it onto a Strawberry Shortcake for the whole family, this vanilla ice cream is the anchor of your entire summer dessert table.

Why You’ll Love This Recipe
- Real, deep vanilla flavor — We use both a whole vanilla bean and pure vanilla extract, so every bite is fragrant and complex, not flat or artificial.
- Make-ahead friendly — The custard base can be made up to 2 days in advance and stored in the fridge, making churning a quick weeknight or weekend task.
- Budget-conscious — A full batch of 8 servings costs roughly $5–$7 in ingredients versus $6–$10 for a single premium pint at the store.
- Versatile base — This is the foundation for dozens of flavors and mix-ins. Master this and the flavor world opens up completely.
- Family-tested crowd pleaser — Kids love it, adults love it, and it pairs with every summer dessert you already make.
- No mystery ingredients — Five core ingredients, all of which you can pronounce and probably already have at home.
Key Ingredients
The brilliance of homemade vanilla ice cream is that its quality comes almost entirely from the quality of a handful of simple ingredients — so let’s talk about what each one actually does. Heavy cream is the backbone of richness here; it’s what gives the finished ice cream that luxurious, scoopable texture rather than an icy or grainy one. You want full-fat, no substitutions. Alongside the cream, whole milk loosens the base just enough to keep it from being too dense while contributing additional fat and structure. Skimping with low-fat milk will show up in the texture. Egg yolks are the secret weapon of a proper churned custard base — they emulsify the fat and dairy into a stable, silky mixture that churns into something genuinely extraordinary. Four to six yolks is the sweet spot for richness without making it feel heavy. The star of the show is real vanilla, and we mean it — a whole split vanilla bean scraped into the warm cream base, plus a hit of pure vanilla extract at the end, layers in a floral, complex flavor you simply cannot fake with imitation vanilla. Finally, granulated sugar doesn’t just sweeten; it also lowers the freezing point of the mixture slightly, which directly contributes to a creamier, softer scoop straight from the freezer. Get these five ingredients right and you’ve done most of the work already.
Pro Tips & Variations
Temper your eggs slowly. The most common mistake when making a custard base is scrambling the eggs by adding hot cream too fast. Add the hot cream to the egg yolks in a slow, thin stream while whisking constantly. If you go too fast, you’ll end up with sweet scrambled eggs — and nobody wants that. Take your time on this step and you’ll be rewarded with an impossibly silky base every single time.
Chill your base completely before churning. This is non-negotiable. A warm or even room-temperature custard will churn poorly and result in a coarser texture. We recommend chilling the base for at least 4 hours, but overnight is genuinely ideal. This is what makes this recipe such a smart make-ahead option — prep the custard the night before, and churning takes just 20–25 minutes the next day. According to the food scientists at Serious Eats, a fully chilled base also freezes faster during churning, which means smaller ice crystals and a dramatically creamier result.
Don’t over-churn. Pull the ice cream from the machine when it reaches a soft-serve consistency — thick, creamy, and holding its shape but not yet frozen solid. It will firm up to a perfect scoopable texture during the 2–4 hour hardening phase in the freezer. Over-churning can introduce too much air and make the texture feel foamy rather than dense and creamy.
Use a pre-frozen bowl if your machine requires it. If you have a compressor-style machine, you’re all set. But if you have a bowl-style ice cream maker, make sure that bowl has been in the freezer for at least 24 hours before you start. A partially frozen bowl is one of the most common reasons a batch doesn’t churn properly.
Press plastic wrap directly onto the surface before putting the ice cream container in the freezer for the hardening phase. This prevents ice crystals from forming on the top layer and keeps the surface creamy all the way through.
Flavor variations to try:
- Brown Butter Vanilla: Brown your butter before adding it to the custard base for a nutty, caramel-adjacent depth that is absolutely stunning.
- Cookies & Cream: Fold in crushed chocolate sandwich cookies during the last 2 minutes of churning.
- Strawberry Swirl: Swirl in a quick strawberry jam right as you transfer to the freezer container — pairs beautifully with our summer berry desserts.
- Espresso Chip: Add 1 tablespoon of espresso powder to the warm custard base and fold in chocolate chips at the end of churning.
- Salted Caramel Ripple: Drizzle homemade caramel and a pinch of flaky sea salt between layers as you pack the churned ice cream into the container.
Looking for more frozen summer treats the whole family will love? Our Mixed Berry Popsicles are another make-ahead freezer staple that kids go absolutely wild for — real fruit, no artificial anything, and practically zero effort.
For even more inspiration on building a proper custard base, the team at Bon Appétit breaks down their approach to the classic custard method in detail — worth a read if you want to geek out on the technique.
Nutritional Highlights
Homemade vanilla ice cream is absolutely a treat — and we’re not here to pretend otherwise. A generous 2-scoop serving clocks in at around 320–350 calories, with a good portion of that coming from the healthy fats in heavy cream and egg yolks. Unlike many store-bought options, this recipe has no stabilizers, no corn syrup, no artificial flavors, and no mystery emulsifiers. You know exactly what’s in it. The egg yolks contribute fat-soluble vitamins A, D, and E, along with choline. The dairy contributes calcium and protein. Is this a health food? No. Is it a real, honest, made-from-scratch dessert with clean ingredients that you can feel good about serving your family on a hot summer night? Absolutely yes. Portion-conscious families can serve smaller scoops alongside fresh berries or a slice of fruit-forward dessert to round out the plate beautifully.
Frequently Asked Questions
Do I need an ice cream maker to make this recipe?
An ice cream maker gives you the best possible texture — light, airy, and smooth — because churning incorporates air and prevents large ice crystals from forming. That said, if you don’t own one, you can use the no-churn method as a workaround: whip 2 cups of heavy cream to stiff peaks, fold it into your sweetened base (skip the egg custard in this case and use sweetened condensed milk instead of egg yolks and sugar), and freeze in a loaf pan, stirring vigorously with a fork every 30–45 minutes for the first 3 hours. The texture won’t be quite as smooth or creamy as a properly churned batch, but it’s a legitimate budget-friendly alternative that still tastes worlds better than store-bought. If you’re planning to make ice cream regularly — and trust us, after this recipe you will be — a basic bowl-style ice cream maker is an inexpensive investment that pays for itself within a few batches.
Why did my ice cream turn out icy instead of creamy?
Iciness in homemade ice cream almost always comes down to one of three causes. First, your custard base may not have been cold enough before churning — always chill it for a minimum of 4 hours, ideally overnight. A warm base means slower freezing in the machine, which means larger ice crystals. Second, your ice cream maker bowl may not have been frozen solid enough — it should be in the freezer for at least 24 hours before use. Third, the ratio of fat may be off — make sure you’re using full-fat heavy cream (not half-and-half or whipping cream with lower fat content) and whole milk, not 2% or skim. Sugar also plays a role: too little sugar raises the freezing point and can make the final product harder and icier. Stick to the recipe ratios and you’ll get a perfectly creamy result every time.
How long does homemade vanilla ice cream keep in the freezer?
Homemade ice cream is at its absolute best within the first 1–2 weeks, when the texture is at peak creaminess and the vanilla flavor is most vibrant. It will technically keep for up to 6 weeks in the freezer, but after about 2–3 weeks it starts to develop more ice crystals and the texture becomes slightly less smooth — this is normal and happens because homemade ice cream lacks the commercial stabilizers that extend shelf life. To maximize freshness, store it in an airtight, freezer-safe container with plastic wrap pressed directly onto the surface of the ice cream before sealing the lid. If your ice cream gets too hard to scoop straight from the freezer (especially after the first week), simply let it sit on the counter for 5–8 minutes before serving — it’ll soften right up to the perfect consistency.

Let’s Make Summer Sweeter
This homemade vanilla ice cream is the kind of recipe that becomes a family tradition — the one the kids start requesting by name, the one you make for every summer gathering, the one you’re secretly proud of every single time someone asks where you bought it. It’s simple enough for a weeknight and special enough for company, and once you’ve got the base mastered, the flavor possibilities are genuinely endless.
If you make this recipe this summer, we’d absolutely love to hear about it. Leave a comment below telling us what you paired it with, what variations you tried, or how the family reacted when you set it on the table. Save this post to your Pinterest boards, share it with your family group chat, and tag us when you post your scoop shots — nothing makes our day quite like seeing your beautiful batches of homemade ice cream come to life. Happy churning! 🍦
Find the complete recipe card below ↓

Homemade Vanilla Ice Cream
Equipment
- Medium saucepan
- Fine-mesh sieve
- Instant-read thermometer
- Large mixing bowl
- Whisk
- Ice cream maker
- Freezer-safe airtight container
- Plastic wrap
Ingredients
Ice Cream Base
- 2 cups heavy cream full-fat, divided
- 1 cup whole milk do not substitute low-fat
- 3/4 cup granulated sugar
- 5 large egg yolks room temperature
- 1 vanilla bean split lengthwise and seeds scraped
- 1 1/2 tsp pure vanilla extract added after cooking
- 1/4 tsp fine sea salt
Instructions
Make the Custard Base
- In a medium saucepan, combine 1 cup of the heavy cream, the whole milk, half the sugar (6 tablespoons), the scraped vanilla bean seeds, and the vanilla pod. Heat over medium heat, stirring occasionally, until steaming and just beginning to simmer around the edges — do not boil. Remove from heat.
- In a medium bowl, whisk together the egg yolks and remaining sugar (6 tablespoons) until the mixture is pale, thick, and falls from the whisk in a ribbon, about 2 minutes.
- Temper the eggs: while whisking the yolk mixture constantly, very slowly pour in the hot cream mixture in a thin, steady stream. Go slowly — rushing this step will scramble the eggs. Once about half the hot cream is incorporated, pour the tempered yolk mixture back into the saucepan.
- Return the saucepan to medium-low heat. Cook the custard, stirring constantly with a wooden spoon or heatproof spatula and scraping the bottom of the pan, until the custard thickens enough to coat the back of a spoon and registers 170–175°F on an instant-read thermometer, about 6–8 minutes. Do not let it boil.
- Remove from heat and strain the custard through a fine-mesh sieve into a large bowl or measuring pitcher to remove the vanilla pod and any cooked egg bits. Stir in the remaining 1 cup of heavy cream, the vanilla extract, and the sea salt. Stir to combine.
Chill the Base
- Set the bowl over an ice bath and stir occasionally until the custard is cool, about 20 minutes. Alternatively, cover the surface directly with plastic wrap (to prevent a skin from forming) and refrigerate for at least 4 hours or overnight. The base must be thoroughly cold before churning — overnight chilling gives the best results.
Churn and Freeze
- Pour the chilled custard into your ice cream maker and churn according to the manufacturer's instructions, typically 20–25 minutes, until the ice cream reaches a thick, soft-serve consistency.
- Transfer the churned ice cream to an airtight, freezer-safe container. Press a sheet of plastic wrap directly onto the surface of the ice cream to prevent ice crystals. Seal with the lid and freeze for at least 2–4 hours, or until firm enough to scoop.
- To serve, let the ice cream sit at room temperature for 5–8 minutes to soften slightly for easy scooping. Scoop into bowls or cones and enjoy.
