There’s something magical about the smell of fresh bread filling your kitchen, especially when you’ve made it from scratch using just a handful of pantry staples. This sourdough bread recipe has become my go-to weekend project that sets my family up for the entire week ahead. Unlike complicated artisan recipes that demand constant attention, this approach works with your busy schedule, not against it.
I discovered this recipe during one of those chaotic weeks when grocery runs were impossible and my pantry was running low. With just flour, water, salt, and my trusty sourdough starter, I managed to create two beautiful loaves that lasted us through countless breakfast toasts, sandwich lunches, and dinner sides. The best part? Most of the work happens while you’re sleeping or going about your day, making it the ultimate hands-off recipe for busy families.
What started as a necessity has become a beloved family tradition. My kids now expect the weekend bread-making ritual, and honestly, there’s nothing quite like slicing into a warm, crusty loaf that cost a fraction of store-bought bread while delivering infinitely better flavor and nutrition.

Why You’ll Love This Sourdough Bread Recipe
Budget-Friendly: At less than $2 per loaf, this recipe stretches your grocery budget while feeding your family wholesome, homemade bread that would cost $6-8 at the bakery.
Perfect for Meal Prep: Bake two loaves on Sunday and you’re set for the week. One for immediate use, one for the freezer – it’s like having a bakery in your kitchen.
Flexible Timing: The long fermentation process means you can start it when convenient and bake when ready. Perfect for working parents who need recipes that adapt to their schedule.
Kid-Approved: Unlike dense, store-bought whole grain breads, this has the perfect chewy texture and tangy flavor that even picky eaters love.
Pantry Staple Ingredients: No specialty flours or hard-to-find ingredients required. Just four simple components you probably already have.
Make-Ahead Magic: The dough can be refrigerated for up to a week, meaning you can prep during downtime and bake fresh bread whenever you need it.
Key Ingredients
The beauty of sourdough bread lies in its simplicity – just four ingredients create something truly extraordinary. Your sourdough starter is the heart of this recipe, providing both the rise and that distinctive tangy flavor that makes homemade bread so special. If you don’t have an active starter yet, don’t worry – you can easily create one or ask around your neighborhood; fellow bakers love sharing! Bread flour gives you the perfect chewy texture and strong gluten structure needed for those beautiful holes and crusty exterior, though all-purpose flour works in a pinch. Quality salt enhances every flavor in the bread and controls fermentation – I prefer kosher salt for its clean taste and easy measuring. Finally, filtered water might seem like a small detail, but chlorinated tap water can inhibit your starter’s activity, so this simple swap ensures consistent results every time.
Pro Tips & Variations
Timing is Everything: Start your bread on Friday evening for fresh Saturday morning loaves, or begin Sunday for weekday sandwich bread. The long fermentation actually improves flavor, so don’t rush the process.
Temperature Matters: Cooler kitchens mean longer rise times, warmer kitchens speed things up. In winter, I place the dough near (not on) a heating vent. In summer, the counter works perfectly.
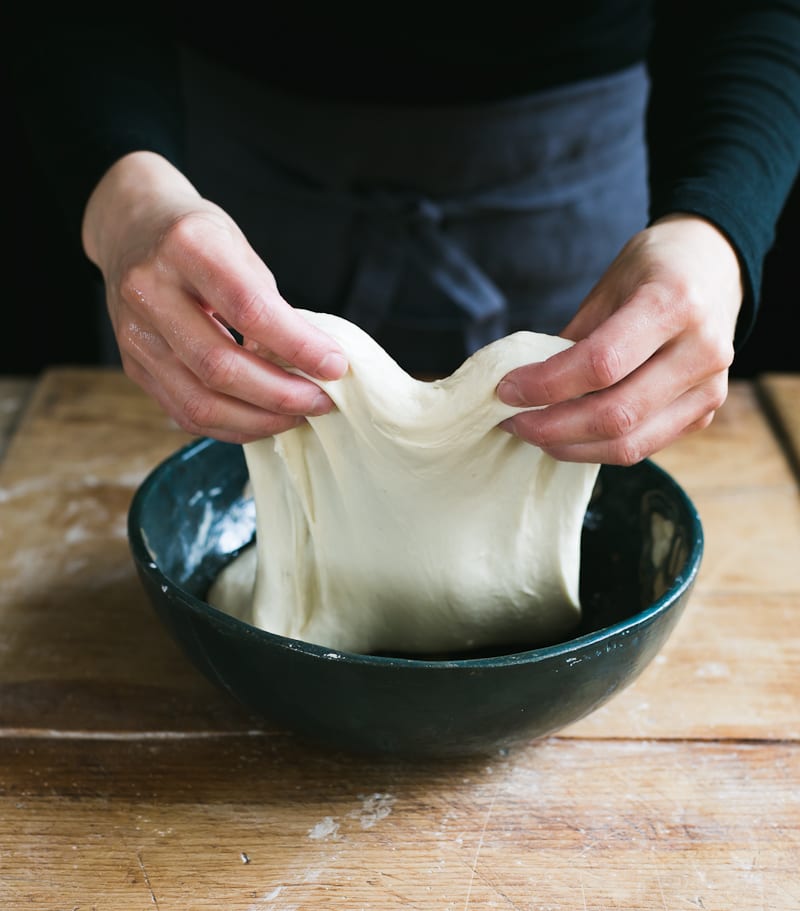
The Stretch and Fold Technique: Instead of traditional kneading, perform 4 sets of stretch and folds during the first 2 hours. This develops gluten while you go about your day.
Make It Your Own: Add herbs like rosemary and thyme for a savory twist, or fold in seeds and nuts for extra nutrition. My kids love when I add a handful of shredded cheese during the final shaping.
Storage Solutions: Slice and freeze half the loaf immediately. Frozen slices toast beautifully straight from the freezer, giving you fresh bread taste anytime. Store unfrozen portions cut-side down on a cutting board, covering with a clean kitchen towel.
Troubleshooting Dense Bread: If your loaf turns out heavy, your starter might need more time to become active, or your kitchen might be too cool. This comprehensive guide helped me solve early sourdough struggles.
Scaling for Large Families: Double this recipe easily – the timing stays the same, you’ll just have four loaves instead of two. Perfect for weekend breakfast casseroles or meal prep sessions.
No Dutch Oven? Create steam by placing a metal pan on the oven’s bottom rack and adding hot water when you load the bread. Cover loaves with an inverted metal bowl for the first 20 minutes.
Nutritional Highlights
Sourdough bread offers impressive nutritional advantages over commercial breads, making it a smart choice for health-conscious families. The long fermentation process breaks down gluten and phytic acid, making nutrients more bioavailable and the bread easier to digest – even for those with mild gluten sensitivities. Each slice provides quality carbohydrates for sustained energy, plus beneficial probiotics from the fermentation process that support gut health. Unlike store-bought breads loaded with preservatives and additives, this homemade version contains only real ingredients your body recognizes. The lower glycemic index compared to commercial breads means steadier blood sugar levels, making it perfect for keeping kids satisfied longer. Research shows that sourdough’s fermentation process actually increases the bread’s antioxidant content while reducing its impact on blood sugar.
Frequently Asked Questions
Can I make this bread ahead of time?
Absolutely! This recipe is designed with busy schedules in mind. You can prepare the dough and let it cold-ferment in the refrigerator for up to 5 days before baking. This actually improves the flavor and makes timing completely flexible. For maximum convenience, shape your loaves and freeze them unbaked – they can go straight from freezer to Dutch oven, just add an extra 15 minutes to the baking time. I often make a double batch on Sunday, bake two loaves immediately, and keep shaped dough in the fridge for fresh bread later in the week.
What if I don’t have a sourdough starter?
Creating a sourdough starter from scratch takes about 7-10 days, but it’s incredibly simple – just flour, water, and patience. Mix equal parts flour and water, leave it covered on your counter, and feed it daily with fresh flour and water until it bubbles reliably. Alternatively, ask friends, check local baking groups, or visit artisan bakeries – most are happy to share starter. Many communities have sourdough sharing networks on social media. Once you have an active starter, maintain it in the fridge and feed it weekly, or keep it on the counter and feed daily if you bake frequently.
How should I store leftover sourdough bread?
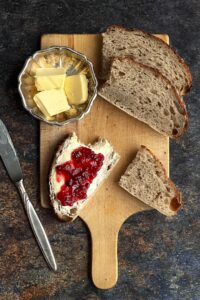
Proper storage keeps your homemade bread fresh for days. Store unsliced loaves cut-side down on a cutting board, covered with a clean kitchen towel – this maintains the crust while preventing the crumb from drying out. For longer storage, slice the bread and freeze portions in freezer bags. Frozen slices toast perfectly straight from the freezer, giving you fresh bread taste anytime. Avoid plastic bags for fresh bread as they make the crust soggy. If bread starts to stale, transform it into amazing French toast casserole or breadcrumbs for other recipes.

This sourdough bread recipe has transformed how my family thinks about homemade baking. It’s proof that the most satisfying foods often come from the simplest ingredients and a little patience. The smell of fresh bread, the satisfaction of creating something nourishing from scratch, and the way it brings everyone to the kitchen – these moments make the minimal effort so worthwhile.
Whether you’re looking to stretch your grocery budget, reduce processed foods in your family’s diet, or simply want to fill your home with the incredible aroma of fresh bread, this recipe delivers on all fronts. Save this recipe, share it with friends who love practical cooking solutions, and don’t forget to tag us when you bake your first loaf!
Find the complete recipe card below ↓
Sourdough Bread
Equipment
- Large mixing bowl
- Kitchen towels
- Dutch oven
- Wire cooling rack
- Sharp knife or lame
Ingredients
- 1 cup active sourdough starter fed and bubbly
- 1 1/2 cups warm water filtered preferred
- 4 cups bread flour all-purpose works too
- 2 teaspoons kosher salt
Instructions
- In a large mixing bowl, combine active sourdough starter and warm water. Stir until well mixed and slightly foamy.
- Add flour and salt to the bowl. Mix with a wooden spoon or your hands until a shaggy dough forms. Cover with damp kitchen towel and let rest 30 minutes.
- Perform first stretch and fold: wet your hands, grab one side of dough, stretch up and fold over to opposite side. Rotate bowl 90 degrees and repeat 3 more times. Cover and rest 30 minutes.
- Repeat stretch and fold process 3 more times, resting 30 minutes between each set. Dough will become smoother and more elastic.
- After final fold, cover tightly and let rise at room temperature 4-6 hours until doubled in size, or refrigerate up to 5 days.
- Turn dough onto floured surface and divide in half. Shape each portion into a round loaf, creating surface tension by tucking edges under.
- Place seam-side up in banneton baskets or bowls lined with floured kitchen towels. Cover and proof 2-4 hours at room temperature, or overnight in refrigerator.
- Preheat Dutch oven and lid to 450°F for 45 minutes. Carefully turn one loaf onto parchment paper, score top with sharp knife.
- Lower bread into hot pot using parchment paper. Cover and bake 20 minutes, then remove lid and bake 20-25 minutes until deep golden brown.
- Remove from pot and cool on wire rack at least 1 hour before slicing. Repeat with second loaf or refrigerate for later baking.
